Antenna Bracket for 2007 Tahoe
K5LAD – April 30, 2007
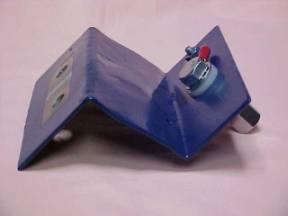
This is the top view of the bracket made for holding a mobile
antenna (Little Tarheel) on my 2007Chevrolet Tahoe. The
bracket was constructed from the outside case from a Motorola mobile transceiver. The steel used was 3/32” thick and very
difficult to cut but, thanks to Grant – KD5AFS, he did a beautiful job. The completed piece is 4 1/8” wide, 5
1/2” and has two bends to shape it like a capital Z.
The dimensions are not particularly critical and can be larger or somewhat smaller,
depending on how high off the area of the fender and hood you’d like for your antenna
to be. To determine the sizes I wanted, I
took a piece of cardboard and cut and bent it to look pretty good to me.
My Tahoe is dark blue so I looked around in the garage and found
a can of fairly dark blue spray paint and let it go at that. A purist would probably get a can of matching
color paint but I’m no purist. I did
also find a spray can of primer and gave the metal a couple of coats of that to prepare
it. I also baked the primer-painted piece in
my wife’s oven for a couple of hours. I
also discovered that, although the electronic thermostat setting shows that it goes to 100
degrees, it actually will only go as low as 170 degrees so that is the temperature I
“cooked” it.
The metal piece was originally a black color with an apparently
anodized coating on both sides and that coating was stuck to the bare metal mighty well. I eventually brought the piece to bare metal by
chucking a rotary wire brush up in my drill press. Several
of the pictures shown here show the black coating still on the original piece. The coating grinding process was difficult as took
me several sessions to do it completely. When
finished, the metal piece was totally bare and ready to receive the primer.
Also, I had determined where I wanted the holes in
the piece and drilled them before I attempted to make the bends.

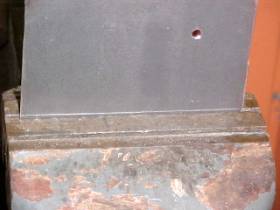
These two pictures were attempts I made on some scrap metal. I scribed a mark where I wanted the bend and I
wanted to see how large or small the radius of the bend would be since I needed the bend
on the good metal piece to be correct the first time.
The scrap used was actually thinner than the good piece but I hoped it would give
me a good idea and it did.
With the scribed line right above the jaw of the vice, the bend
was OK for what I wanted and I thought this activity a valuable use of my time.
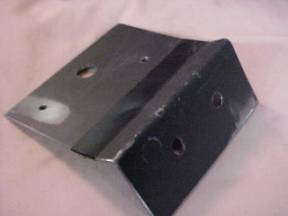
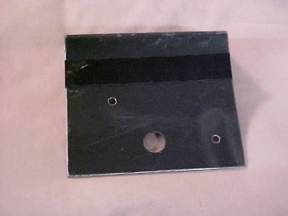
These two pictures show the actual piece of metal used with all
holes drilled and one bend done. You can see
the anodized coating on this piece and you can see where I’ve wire-brushed the
coating off of several places. Also
you’ll see a darker black area going across the piece.
That is black plastic tape and I used it to protect the finish on the Tahoe’s
hood while I determined just how much to bend the metal.
I also placed another piece of plastic tape on the edge of the hood where it meets
the metal piece. When the bracket is just
like I want it, I will remove the piece of hood tape but I plan to add the tape back on
the bracket as a protection. When the bracket
is bent just the right amount, there is sufficient room between the fender and the hood
without touching but a piece of tape permanently on the bracket will be cheap insurance in
case something like a big bird hits the Little Tarheel antenna while I’m driving
along a highway speeds.

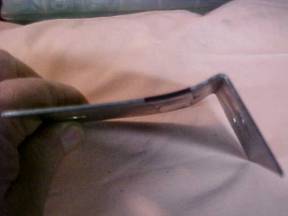
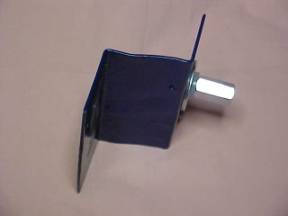
These two pictures show a side view of the bracket after only
the first bend. This was while attempting to
get the angle just right so that it did not touch with the hood closed. You can also see the black plastic tape, which
wraps completely around and protects on both sides.
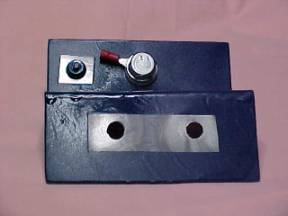
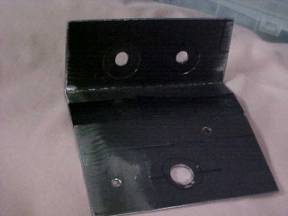
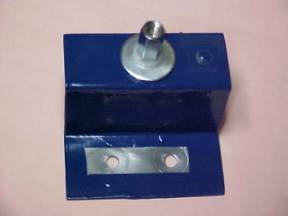
These pictures show the bottom view of the bracket with
the bare metal areas obvious. When the
bracket piece was down to bare metal, and before I had sprayed the first coat of primer, I
taped those areas where I needed the best ground connection. The masks were pieces of black plastic tape that
were placed around the two holes which pass the bolts which hold the bracket to the Tahoe
body and also hold a hood/fender bracket. Both
sides of the bracket were masked off. Also
the smaller area on the top is bare for the ground connection of the coax. The top of this area was also masked with a screw
and washer but some paint seeped under the washer so I’ll need to scrape that area.
Notice that no masking was done around the piece that will hold
the antenna since it is insulated from ground already.
In several of the pictures you can see an extra hole in the
center part of the Z-shaped bracket. This
hole is used to mount a small piece to go around the coax to provide some mechanical
stability.
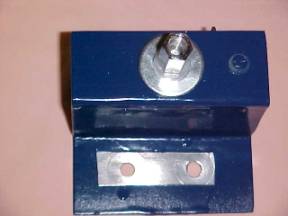

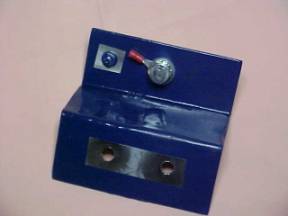
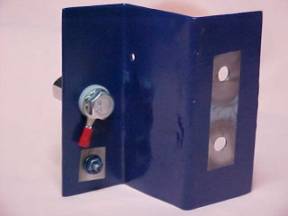
The final four pictures show the top of the bracket. The most obvious thing in these pictures is the
masked off area for the bolts which hold bracket to the vehicle. It is important to have a good, solid ground
connection for a mobile antenna so I’ve gone out of my way to make sure that happens.
The piece into which the antenna is attached is available from
any ham dealer who sells pieces for antennas. Few
hamfests won’t have at least one dealer selling them.
This one has a white-shouldered washer on both sides of the thru-bracket bolt which
insulates the antenna and coax center wire from ground.
The large fender washer under the top insulator was used because, even with
3/32” metal, it was not quite thick enough so this washer added the additional
thickness. NOTE: I Just came back from HamCom Hamfest in Plano, Texas and
several dealers did have the insulated piece for holding the antenna. The price
seemed to be $3.95 at each site so you can calculate your costs from this. Also,
most of these dealers have, for the same price, a similar piece but instead of the bolt
used to connect the center of the coax, it has what essentially is an SO-239. This
would allow you to connect a PL-259 directly but since I was dealing with a very small
area between the bottom of the bracket and top of the fender, I preferred to use the other
type.
Note, also, that the black plastic tape has not yet been
added to the center piece of the Z to protect the paint on both the fender and the hood.
I am aware that my painting job was not perfect and there were
some drips of paint but those should not show. Besides,
if someone doesn’t like the lack of painting perfection I will suggest that they look
the other direction………. or get a life.
UPDATE: I had a chance to use the
screwdriver antenna, mounted on the bracket, this past weekend travelling several hundred
miles each way. The antenna worked well and the bracket was very secure. I
wanted to be sure that driving at high speeds (legal speeds, of course) would not cause
the antenna to set up some sort of damaging vibration. I checked it at highway
speeds, running at all the different coil heights for each band. Even with the
setting for 75 meters, with the coil at it tallest extreeme, the bracket was rock solid.
Note: I will add some additional pictures soon to show the
actual installation on the vehicle.